How to Connect to the Wired Network
Wired networks can offer a faster, more stable internet connection when downloading large files, streaming video, gaming, or meeting virtually. They can also serve as a backup option if you lose connection to the wireless network. Follow the steps below to connect to CMU’s wired network.
- Visit getonline.cmu.edu.
- Click Connect to the Wired Network and follow the prompts.
Key Terms
Ethernet Outlet
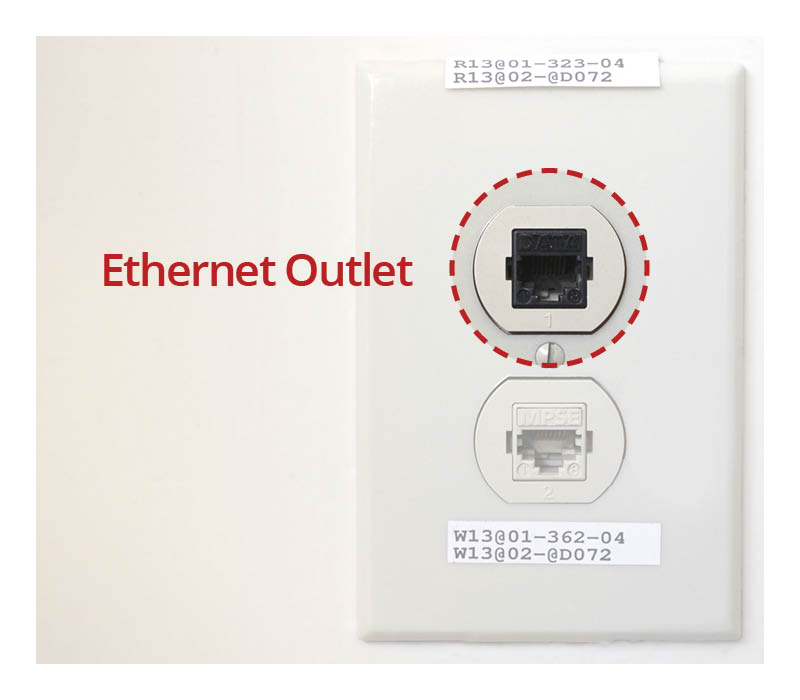
An ethernet outlet is a small rectangular port mounted on your wall. It is similar in size to a standard electrical outlet but instead contains anywhere between one and eight small plugs. As you connect to the wired network, you will connect your device to one of the plugs using an ethernet cable.
Outlet Label
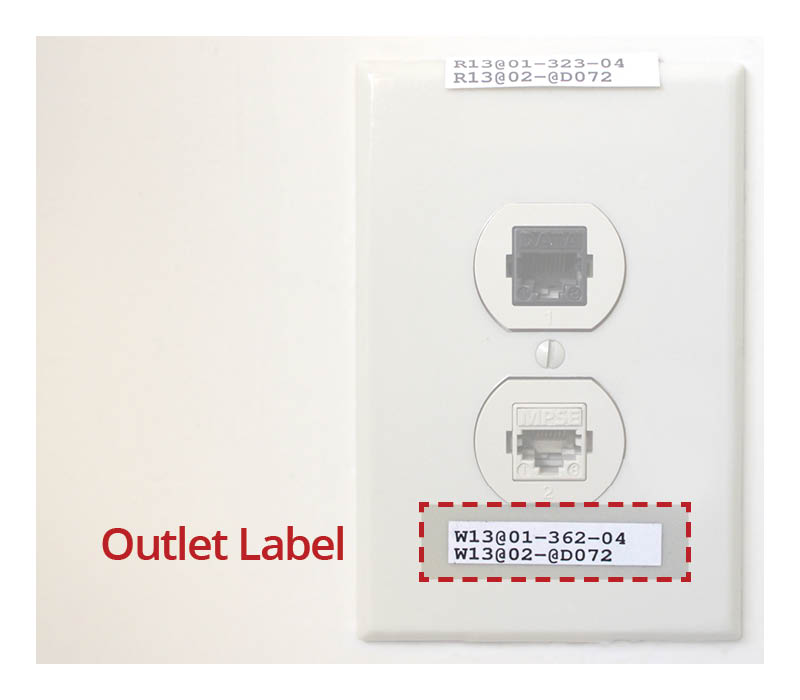
At CMU, we identify ethernet outlets using two 11 digit labels. For example, you may see something similar to the following above or below an outlet.
R13@01-323-05
R13@02-@D073
As you connect to the wired network, you will use the label to help identify whether the ethernet outlet you would like to use is active or not.
Note: Outlet labels in the Tepper Quad use a new labeling scheme and may look more similar to the following example: 142-01-A12-09.
Ethernet Cable and Adapter
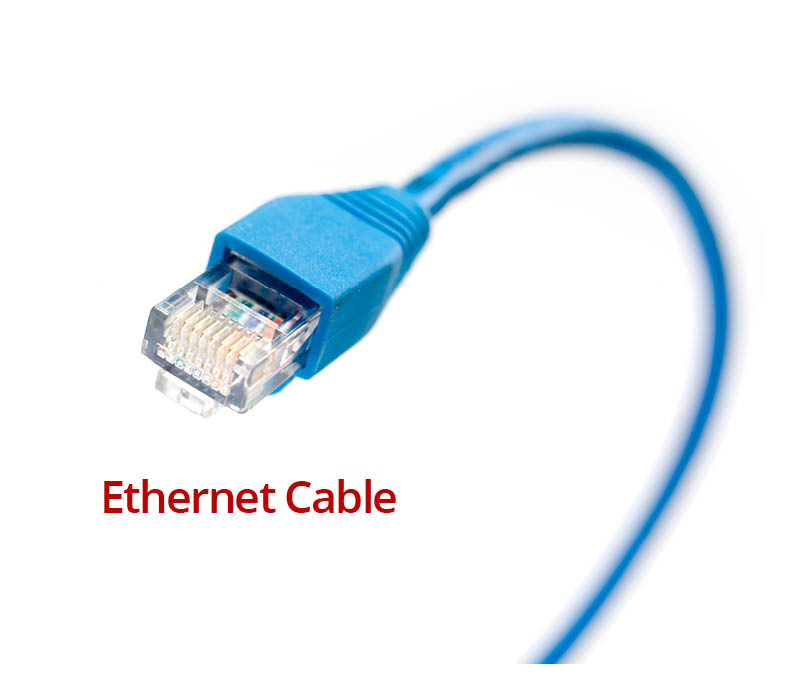
An ethernet cable is the wire you will use to connect your device to your ethernet outlet.
If your device doesn’t have an ethernet port, you will need to use an adapter. Check your device to see which ports you have available before you get an adapter. Common adapters include USB-C to ethernet and USB to ethernet.
How to Get an Ethernet Cable or Adapter
- Faculty, staff, and student employees can request them from their departmental IT administrator.
- All other students can purchase them from the CMU Tech Store or another vendor.
CMU Desktop Phone
A CMU desktop phone is any landline phone that is managed by the university. You’re most likely to see an active desktop phone in an office or conference room.
If you're near an active CMU desktop phone, you can connect your ethernet cable from your device to your phone's extra ethernet port to take advantage of your phone's wired connection.
Not sure if you're near a phone? Compare what you’re seeing to our phone guides.
Troubleshooting
I received a security warning after I plugged in my ethernet cable.
Your browser is responding to a security feature in our network.
- (Optional) If prompted, you can choose to view the certificate and verify that it is issued by InCommon RSA Server CA.
- Click through the prompt to continue to GetOnline and register your device.
I plugged in my ethernet cable but nothing happened.
Try the following troubleshooting methods in order:
- Open a new browser window using the same browser and visit any website. You may then have to click through a security warning.
- Open a new browser window using a different browser. For example, if you’re using Google Chrome, try Safari or Firefox, and visit any website. You may then have to click through a security warning.
- Turn off any pop-up blockers.
- Enter your location and check if your outlet is active.
- If you think you’ve registered your device before, wait 10 minutes or restart your device to see if you connect to the wired network automatically.
- Register your device manually.*
*Always register manually if you're connecting a device that cannot access a web browser, such as a gaming console or virtual assistant.
If you’re still having trouble, contact the Computing Services Help Center at it-help@cmu.edu or 412-268-4357 (HELP).
I received a prompt from netreg.net.cmu.edu.
- Click Enter.
- Download the Root Certificate if prompted.
- Log in with your Andrew userID and password if prompted.
- Click Register New Machine.
- Click the Building drop-down and select your location, then click Continue.
- Click the Subnet drop-down, then click Continue.
- Enter the Basic Information:
- Hostname (optional) - enter a nickname for your device.
- Domain Name - select andrew.cmu.edu unless your group is listed.
- Hardware address - enter your device's MAC address.
- Affiliation - select your affiliation.
- Click Continue. Your registered device will be listed below. Device registrations may take up to 30 minutes to complete after submission.