Starter Site
After requesting a new site and completing the approval process, you will be provided with a generic "out of the box" site as shown in the example. Your task will be to take the starter site and make it your own, meaning repurposing the basic elements provided, then building up to complete your site.
New to the CMS?
Start with CMS 101: Basic Foundations to bring you up to speed. Here's an assist to push you in the right direction:
- Log into the CMS
- Select the new site in the Site Selector in the Main Toolbar
- Click on the index page in the Asset Tree to view the home page of the site
- Follow the steps below to complete your site from start to finish
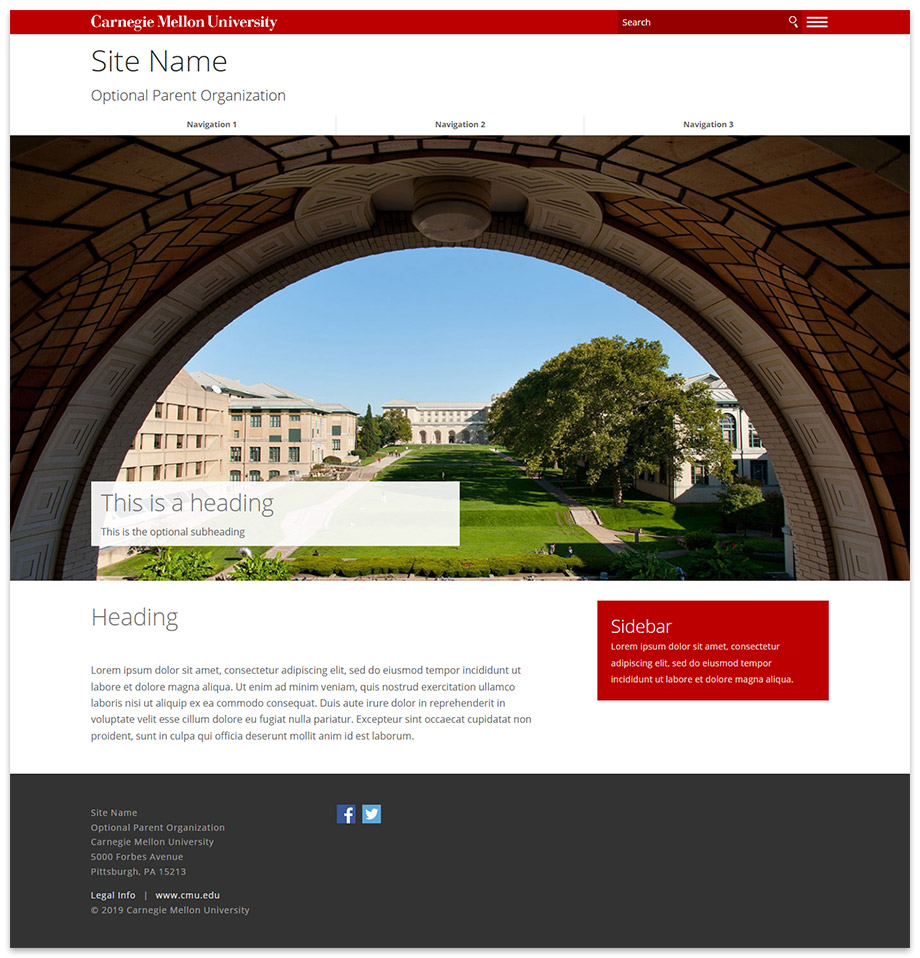
An example of a starter site page. Customizable elements allow you to make the site your own.
Step 1: Configure Basic Site Information
The Setup Block in the base level of the site contains the content displayed in the header and footer regions throughout the site, including basic information about your department or group such:
- Official name
- Parent organization
- Contact information
- Social media
After configuring the Setup Block, the information will automatically display on every page, including new ones you create.
More on configuring the Setup Block.
Step 2: Repurpose the Starter Assets
New sites are provisioned with "starter" assets (e.g., generic pages, folders, images) to establish a basic site structure; these assets should be repurposed to accommodate your content. Follow the steps below.
- Rename Assets - Assets will need to be renamed to be relevant. There are two types of names you will need to change:
- System Name - The name that appears in the Asset Tree; follow the system name guidelines and rename system names for pages and folders
- Page Title - The name that is used as the navigation label (i.e., the user-friendly name of a page). Instead of "Navigation 1," rename it to one of your topics, such as "Research." Page Title is very important for search engine optimization so be sure to name it properly.
The navigation label of a section (i.e., a topic comprised of multiple pages) is specified by the Page Title of the index page within the folder.
- Replace Content - All "placeholder" content including text and images should be replaced with your actual content
Step 3: Complete Your Content Outline
After the starter assets have been repurposed, you will likely need to create additional assets to accommodate the rest of your content. Follow the guidance below.
- Create a new folder for every main topic of your content outline
- Create new pages within the folders
- Upload images and documents
- Arrange the navigation
Step 4: Publish Site to Staging
The staging server is available to all CMS sites for the purpose of reviewing the site on a test environment. You may publish your site to the staging server at any time during development, and share the URL with other reviewers to request feedback. It is also highly advisable that you review the site in its entirety on the staging server before requesting a site launch.
More on publishing.
Step 5: Launch Your Site
Ready to launch your site? Initiate the site launch process here.