Tables
Tables are used to display tabular data on a page, such as a reference chart. Tables can be added to your content using the WYSIWYG.
In the past, tables were used to lay out content on pages. With the features of our current CMS, this isn't necessary as page layout is accomplished through content types, such as WYSIWYG. Using tables for page layout is a bad practice overall, so be sure to use tables for tabular data only.
Insert a Table
- Place your cursor where you want to insert a table
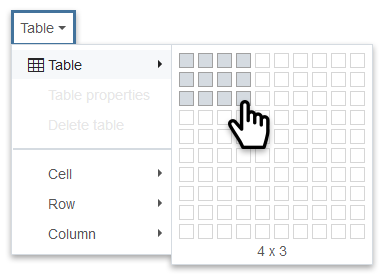
- Click on the Table menu in the toolbar
- Hover over the table tool
 then hover over the boxes to specify initial number of columns and rows (see example); click to finalize selection
 - Populate table cells with data; follow additional guidance below
Hover over the initial number of columns and rows to create the table; you may modify the number of columns and rows as you build the table.
Table Tools
After inserting a table, a selection of tools will display near the table for additional adjustments. If changing the number of rows or columns, place your cursor in a cell closest to where the change should take place.

From left to right:
- Table properties
- Delete Table
- Insert row before
- Insert row after
- Delete row
- Insert column before
- Insert column after
- Delete column
Apply Custom Style
Applying a custom style to a table involves selecting the table tag in the tag path, then selecting the style in the Formats menu.
- Click in any table cell
- At the bottom left of the WYSIWYG window, find the tag path which looks something like this:
table >> tbody >> tr >> td
Click on the table tag - In the Formats menu select Custom > (style)
Applicable styles: alt, noborder
More Ways to Adjust a Table
- Right-click in any cell for more options such as adding a link or image, or to adjust number of columns and rows
- Click in any cell and use the Table menu for additional adjustments
Specify Column Width
- Right-click in a cell in the top row, then Cell > Cell properties; specify the width using a percentage (e.g., 25%)
Create a Header or Footer Row
- Right-click in a cell in the top row, then Row > Row properties; for Row type select Header or Footer
Merge Cells
- Select all cells to be merged, right-click then Cell > Merge cells