Apply Formats
Pre-defined formats are available in the WYSIWYG to apply structure and design to your content.
- Apply formats to establish content structure (e.g., headings and paragraphs)
- Apply formats to enhance visual appeal of content (e.g., displaying an image as a circle) or to adjust placement and layout
Click the button below to see examples on the CMS Demo site of every format available.
Circle custom styles allow for interesting visual layouts.
Applying Formats
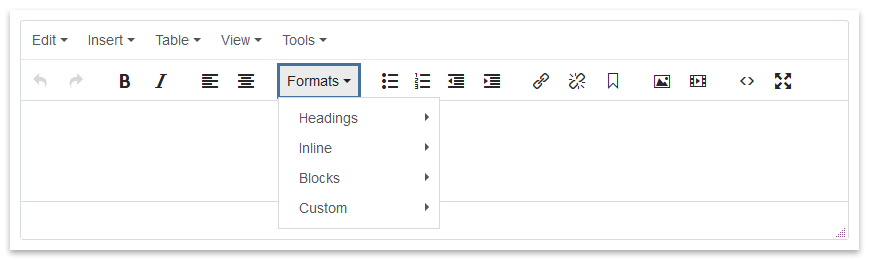
Headings
Designating page headings is very important for accessibility and search engine optimization. There are six headings available which should be used to reflect hierarchy of page content. For example, the primary topic of the page should be the first heading and assigned Heading 1; subheadings (Heading 2, Heading 3, etc.) should be properly nested to reflect the sections and sub-sections of the page.
- Select the text to make a heading
- From the Formats menu, select Heading > Heading (Number)
Inline
The single option of < > code allows code such as HTML to be displayed on the page without the CMS trying to render it. It's not likely to be used often, so unless you're teaching your website visitors how to program in code, you may ignore it.
Note: If you are an advanced website manager and need to add custom code to your site, see Advanced Scripts.
Blocks
There are two block elements that may come in handy while formatting your content.
- Paragraph - While the WYSIWYG automatically creates a paragraph each time you press Enter, there may be times when you need to manually create a paragraph out of a selection of text. Select the text in the WYSIWYG and then from the Formats menu select Blocks > Paragraph.
- Blockquote - Insert a quote by selecting the text and then from the Formats menu select Blocks > Blockquote.
This is how quote formatting will look.
Blocks options Div and Pre are not likely to be used on your site, so they can be safely ignored.
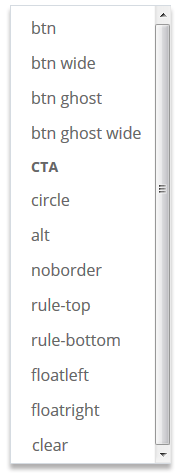
Custom
Custom styles are available to enhance visual appeal of an element or to adjust its placement or layout.
Images
Turn an image into a circle, or float it to the left or right of content; more on applying styles to images.
Applicable styles: circle, floatleft, floatright
Links
Convert a link into a button or a call to action; more on applying styles to links.
Applicable styles: btn, btn wide, btn ghost, btn ghost wide, CTA
Tables
Style a table to have alternating rows of color, or remove the border; more on applying styles to tables.
Applicable styles: alt, noborder
Paragraphs & Headings
Add a rule above or below a paragraph or heading to display a visual separator, or use the "clear" style to prevent overlapping paragraphs (see tip). Select the paragraph or heading and then select the desired style.
Applicable styles: rule-top, rule-bottom, clear
See reference guide of where each style can be applied.
Tips
Which custom styles can be applied to what elements?
Applicable styles for each element are listed in the Custom overview above. Here's a quick reference guide for each style.
 btn, btn wide, btn ghost, btn ghost wide, CTA
Apply styles to links.
circle
Apply style to images.
alt, noborder
Apply styles to tables.
rule-top, rule-bottom
Apply styles to paragraphs and headings.
floatleft, floatright
Apply style to an element such as an image or video to float it to the left or right side.
clear
Apply style to an element such as a paragraph to prevent overlapping content. More on using clear.
I applied a custom style to an element but it gets applied to its parent or child element instead.
If you're finding that a custom style is being applied to the wrong element, you can specify the element you want by selecting it in the tag path displayed at the bottom left of the WYSIWYG window. As you click on various elements in the WYSIWYG, you'll see the tag path for each element, such as:
p >> img
The p represents a paragraph, and the img represents an image within in. To apply a custom style to either the paragraph or image, click on the appropriate tag before applying the style.
What is the "clear" custom style and how do I use it?
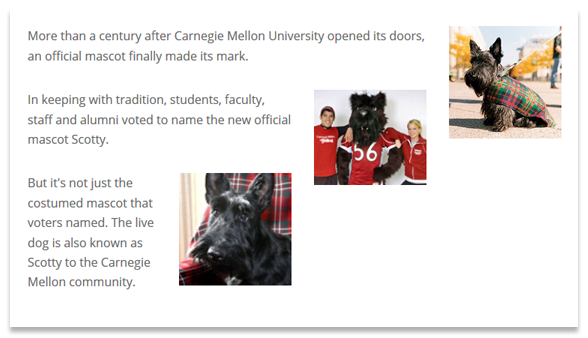
Sometimes when you place an image within a paragraph, the image may take up more vertical space than the text. If there is another paragraph that follows, it will begin below the text rather than the image. This will cause a "staggered" effect, especially if there is an image in the following paragraph. Applying the clear style to paragraphs will prevent this.
For each paragraph, use the tag path to select the p, then select the clear style from the Formats > Custom menu.
Before Clear
After Clear 
The clear style can be used for other elements to define set boundaries for your content.
Can I modify the formats or create my own custom styles?
The formats and custom styles available in the WYSIWYG are pre-defined to conform to the university's branding, so we highly recommend adhering to what is provided. Many of the formats and custom styles are locked down to prevent modifications.
If a custom style is absolutely required, please contact it-help@cmu.edu for consideration.