Publishing
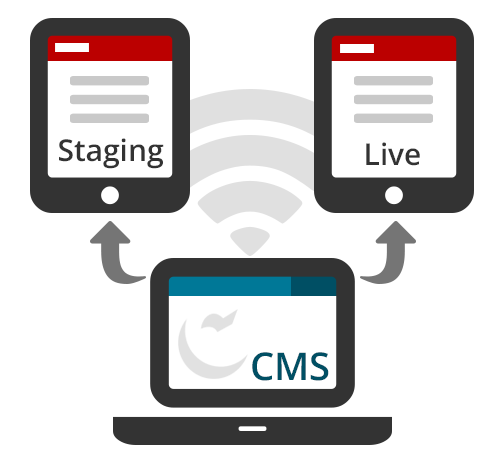
Publishing is the act of "pushing" content to a web server to make it available as a browseable website. All modifications to a website remain in the CMS until a publish is performed.
Publish Destinations
There are two web servers in which you may publish your site to, staging and live; both are enabled by default (if the site has not launched yet, only staging will be an option). During the publish process, you may disable publishing to either destination as needed. A typical workflow involves publishing an asset to staging only for a preview, and then to both servers when ready to go live (this keeps both servers in sync).
Staging Server
The staging server is a test environment for the purpose of previewing a site prior to publishing it live. The staging server is provided during site development, and remains available for testing and previewing purposes after a site has been launched. You may view your site on the staging server at:
https://cms-staging.andrew.cmu.edu/site-name/
Change site-name to your site's folder name in the CMS. You may share this URL with others for review.
Live Server
The live server is where your completed site will be launched to and available to website visitors through your site's official URL (e.g., www.cmu.edu/site-name). The CMS team will perform the initial publish to the live server during site launch; after launch you will be able to publish to the live server at any time.
How to Publish
A publish can be performed on any asset (page, folder, file). When publishing a folder, all contents within the folder will be published; this includes publishing a base folder (i.e., the top-most folder in the asset tree containing the entire site) for a full site publish; base folder publishes are not recommended for larger sites (see tips).
Publish an Asset
- Select the asset in the asset tree
- Click Publish in the Action Toolbar, OR
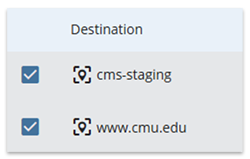
Right-click on asset > Publish - The publish destinations will be listed; if you want to change this, click View Publish Settings to expand the options
- Leave Generate a publish report enabled as this will record the publish job and provide useful information in your Notifications
- Do not modify Output (leave enabled for HTML)
- Check/uncheck the appropriate Destination as needed
- Click Publish at the upper right
A message will display with a link to view the publish queue:

You may also view the publish queue in the Hamburger Menu in the Main Toolbar.
MORE ways to publish
- Publishing multiple assets at the same time is possible through Batch Actions
- Scheduling a page's or file's "go live" date/time is possible using the Start Date option
Check the Publish Queue
The publish queue shows the status of all active publish jobs for a site and can be accessed in the Hamburger Menu in the Main Toolbar. Two publish jobs can be processed at the same time while others wait in the queue.
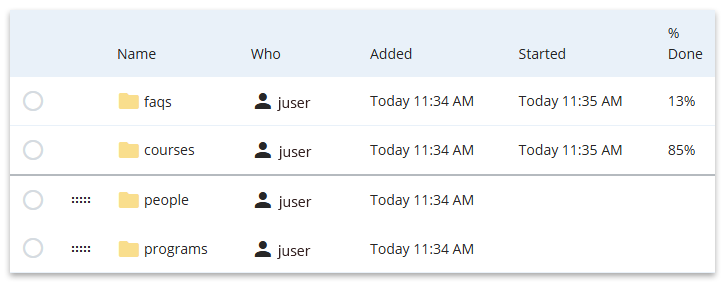
You may modify the publish jobs waiting in the queue; select the radio button to the left of a publish job, then use the controls at the right to perform an action.

From left to right:
- Cancel publish job
- Move to the top of the queue
- Move up one position in the queue
- Move down one position in the queue
- Move to the bottom of the queue
Unpublish an Asset
After being published, an asset can then be unpublished (i.e., removed from a web server). Once unpublished, website visitors will no longer be able to access an asset.
- Select the asset in the asset tree
- Click ••• More > Unpublish in the Action Toolbar, OR
Right-click on asset > Unpublish - Leave Generate a publish report enabled as this will record the unpublish job and provide useful information in your Notifications
- Do not modify Output (leave enabled for HTML)
- Check/uncheck the appropriate Destination as needed
- Click Submit at the upper right
As a safety measure, visit the former URL of the asset to ensure it is no longer online; refreshing your browser multiple times may be necessary to confirm removal.
Disable Publishing
By default, all assets are set to be publishable during creation, however publishing can be disabled. Reasons to disable publishing include:
- An asset that is a work in progress and not ready to be part of the live site
- An asset that has been retired from the live site but should be kept in the CMS for archival purposes
Follow these steps to disable publishing for an asset.
- Select the asset in the asset tree
- Click Edit in the Action Toolbar, OR
Right-click on asset > Edit - Click on the appropriate tab in the edit window:
- For pages and files, click the Configure tab
- For folders, click the Properties tab
- Disable BOTH settings, Include when indexing and Include when publishing
- Submit to save
Note: When the Include when publishing setting is disabled on an asset, it is overridden if you delete the asset; upon deletion, the CMS will unpublish the asset to prevent the creation of an orphan.
Tips
Publishing Guidelines
Adhering to the guidelines below will minimize the demand on system resources, allow for quicker publish times and reduce unsuccessful publish jobs.
- Larger publish jobs should be performed outside of regular business hours (before 9 AM and after 5 PM on weekdays, or any time during weekends)
- When using the Batch Action feature to publish, limit the number of folders to ten at a time
- When a folder contains a large number of assets, consider publishing the assets in smaller groups rather than submitting the folder as a single publish job
- Avoid publishing the base folder (i.e., the top-most folder in the asset tree containing the entire site) if your site is large or contains a large number of files (PDFs, images, etc.)
- In general, submitting smaller publish jobs is better for the overall health of the CMS
How do I know what I should publish?
A good measure is to ask yourself, "what is affected by my update?"
- If you made an update that only affects one asset, publish only that asset
Example: You corrected a typo on a page - If you made an update that affects multiple assets, publish all affected assets. Tip: use the find relationships tool to find and publish assets that may have been affected.
Example: A page's system name has changed and other pages link to it; publish the page and the pages that link to it - If you modified a site-wide element (header, navigation, footer regions), publish the full site; see next topic.
When and how should I publish my full site?
A full-site publish is required every time a site-wide element (header, navigation, footer regions) has been modified; be sure to follow the publishing guidelines when publishing your full site.
- For smaller sites, selecting the base folder (i.e., the top-most folder in the asset tree containing the entire site) to publish is acceptable
- For larger sites, or sites with a large number of files, do not perform a base folder publish; instead, publish sub-folders incrementally
Note: One may think that performing a full-site publish is an efficient strategy to "catch everything" if updates were made on multiple pages. While this will publish all updates, it's not recommended especially if there are multiple website managers working on a site; a full-site publish may publish a page that's a work in progress and not ready to go live.
As a rule of thumb, perform a full-site publish ONLY when required, and notify all other website managers ahead of time so they can disable publishing on assets that are works in progress.
How can I use the Optionally Publish Later feature?
We do not recommend using the Optionally Publish Later feature. If you use this feature for a page, that page will not be published if you later publish the full-site and the future publish date has not yet arrived.
This feature is best for pages that have previously been published and already exist in the navigation. For newly created pages, use the Start Date setting instead.
How do I know if my publish job was successful?
All publish jobs are recorded in your Notifications and contain the subject line:
Publish of Page 'sitename-page' completed (0 issue(s))"
If issues were encountered during publish, it will display the issue count; click on the notification to read more. The most common issue reported is broken internal links; if other issues are reported and you needed help understanding them, please contact it-help@cmu.edu.
Can I schedule a publish?
You can set the initial "go-live" date/time of a page or file using the Start Date option under the Metadata tab; this will trigger an automatic publish to both servers (staging and live) when the date/time is reached. However, if a page is to be added to the navigation, you will still need to manually perform a full-site publish. End Date and Expiration Folder settings are not functional.
Regularly scheduled publish jobs (i.e., an asset set to be published every day at a specific time) are also possible but need to be configured by the CMS team; please contact it-help@cmu.edu to discuss your options.
I tried publishing something but received an error saying the asset is not set to publish.
If a publish attempt is unsuccessful and an error is displayed, it is likely that publishing has been disabled for the asset. Enable publishing based on the error received.
Error 1
Solution: Edit the asset and enable the setting for Include when Publishing; submit publish again.
Error 2
Solution: Find the parent folder(s) that has publishing disabled and enable it. Edit the immediate parent folder and check settings for Include when Publishing; if publishing has not been disabled, check the next parent folder in the hierarchy. After publishing has been enabled for all parent folders of the asset, submit publish again.
In addition to publishing a page, do I need to publish the individual files I use on the page, such as images and documents?
Nope! The CMS is smart enough to know that if a page contains files within its content, the files need to be published too. Simply publish the page and the rest will go along with it!*
*Disclaimer: If the files reside in a folder which has had publishing disabled, the files will not be published. If images are missing from a published page, check to ensure the images' parent folder(s) have publishing enabled.
I published a page and checked the publish queue but it says there are no active publish jobs.
I updated a page and published it but I'm not seeing my changes.
Option 1: Blame the Browser
The number one reason why updates don't appear on a published page is that the browser is not showing you the most up-to-date content. Try these suggestions:
- Allow a minute or two to pass after the publish job has completed, then visit the page and do a hard refresh (shift+refresh); this should force the browser to download the latest version of the page
- Clear your browser's cache to remove stored content; do a Google search to learn how to clear the cache for your specific browser
- Check the page using incognito (anonymous) mode and compare results; if you see the updates, your browser is still cached in regular mode
- Check the page on a completely different browser than what you normally use; if you see the updates, your original browser is still cached
Option 2: Maybe it is the CMS?
Not the browser? Try these tips for additional troubleshooting within the CMS.
- Ensure you have committed a final Submit after updating the page, and that your updates are not still in draft mode; more on Submit, Save & Drafts
- Ensure publishing has not been disabled for the page; if so, you will receive an error message and the publish will not occur
- Check the publish queue to ensure the publish job has completed; an empty queue means all jobs are done; if your publish job is still in progress, please be patient!
- Check your Notifications for publish errors; if a publish job failed, it will be recorded with details of the failure; remedy the issue if possible and try the publish again
If all fails, send an email to it-help@cmu.edu and we'll take a look!
I unpublished a page from my website, but it still shows in the navigation. When I click the link, it says "File Not Found." How do I fix this?
Each time you make a change to a site-wide element, which includes the navigation, a full-site publish is required. Follow the steps below depending on the scenario.
Scenario 1: You deleted the page from the CMS and unpublished it from the website.
Solution: perform a full-site publish to correct the navigation on the live website.
Scenario 2: You unpublished the page from the website but want to keep it in the CMS for archival purposes.
Solution:
- Disable publishing on the page
- Disable page from appearing in the navigation
- Perform a full-site publish to correct the navigation on the live website