Site Management
The site management interface consists of three general panels, Main Toolbar, Asset Tree and Workspace.
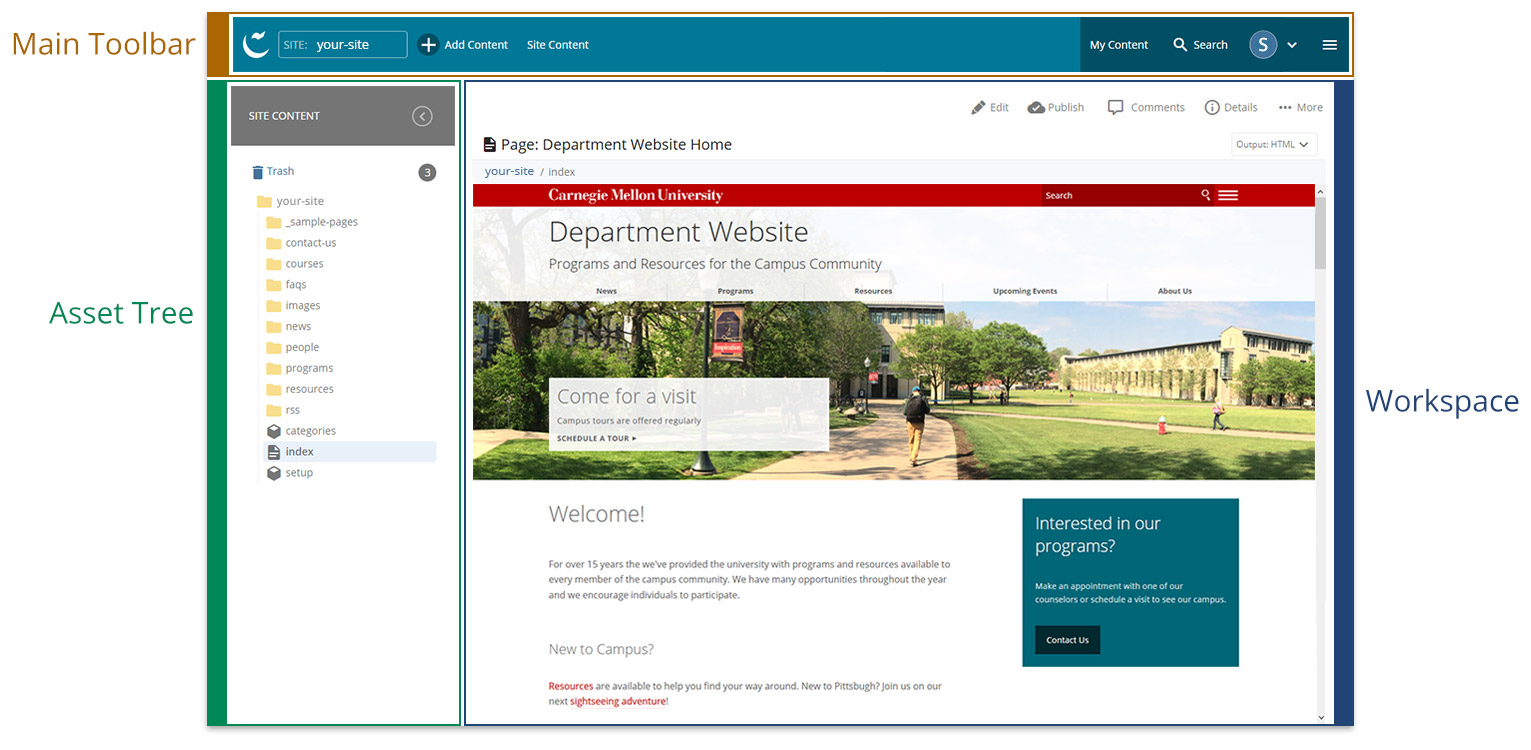
Main Toolbar

The main toolbar is always visible at the top of the interface including on the dashboard. Some options are specific to the site you're working in, while others are general CMS settings.
Elements
- Cascade Logo - Link to dashboard
- Site Selector - Click to select site or type in box to filter by site name
- Add Content - Click to create a new asset (page, folder, file)
- Site Content - Click to view current site in the default state (base folder open in asset tree)
- My Content - Overview of your content including recently updated assets, drafts and tasks; also available as a dashboard widget
- Search - Search for asset by name; enter keywords in box to search current site, then click Go to Full Search for additional search options
- User Menu - Personalization settings, history, notifications (e.g., publish messages) and tasks
- Hamburger Menu - Represented by three horizontal lines, the hamburger menu contains a link to obtain help and support, quick access to available reports and a link to the publish queue if you're within a site
Asset Tree
The asset tree contains the contents of a site.
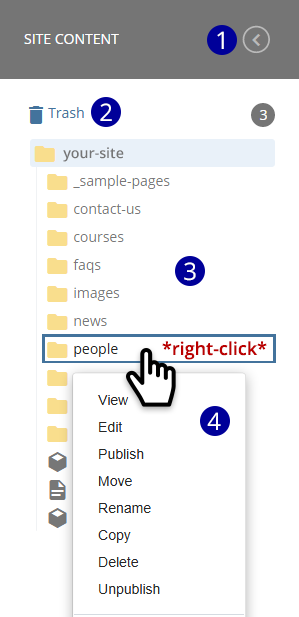
Elements
- Open/Close Toggle - Column can be minimized or maximized
- Trash - Stores deleted assets for 15 days before permanent deletion; click on trash to view or restore contents
- Site Content - Folder structure of site; drill down into folders for assets within
- Context Menu - Right-click on asset to open menu with available tasks
Tip: The asset tree is always ordered alphabetically and does not reflect the site's navigation order. Learn more about arranging the navigation.
Workspace

The workspace is the primary work area in the interface. While the contents of the main toolbar and asset tree remain fixed while you work on a site, the workspace changes depending on type of asset selected and task being performed.
Elements
- Asset Preview - Preview of an asset such as a page or image when selected in the asset tree
- Asset Title/Name & Path - Title of page or name of file and path of asset relative to the base folder of the site
- Action Toolbar - Tasks available for a selected item
- Folder Preview - Contents of a folder when selected in the asset tree; to select a folder, click on the arrow that appears when hovering over the folder in the asset tree
- Checkboxes - Top-most checkbox selects/deselects all assets in folder for further batch actions; individual checkboxes may also be selected
- Folder Asset List - List of assets within selected folder
- Folder View & Filter - Change layout of assets (thumbnails or list) and filter assets for quick search
Congratulations!
You have completed CMS 101. You are now ready to take the next step and start working in the CMS. Whether you are starting a new site from scratch or maintaining an existing site, instructions for every task are available on this website. Start building!
Questions? Help resources are available.