Student Guides
Canvas Settings:
How-to: Change my Display Name
How-to: Hide Courses from Dashboard
How-to: Change Notification Settings
Integrated Tools:
You can always get to the Syllabus Registry from within Canvas. Just click on the “Help” icon in the left black navigation bar to find the link.
How-to: Use Respondus LockDown Browser
How-to: Complete a Peer Review Assignment
Settings
Policy: Course Lifecycle
Students: you have access to Canvas courses during the enrolled semester plus three weeks into the following semester. Access will be removed unless otherwise granted by your instructor.
- Fall - Three weeks into Spring semester
- Spring - Three weeks into Summer semester
- Summer - Three weeks into Fall semester
How Do I Change My "Display" Name in Canvas?
Canvas pulls all name information from the CMU Directory. If you would like to change your display name in Canvas, you will need to enter a preferred name in the CMU Directory.
Note that, while this will change your display name, your legal name will remain the same. If you would like to change your legal name, please contact the HUB.
- Log into your SIO account
- Click on the “My Info” tab and then “Edit My Info” button
- Add preferred name to the “Preferred Name” field and click Submit
Please note: it can take up to 24 hours for changes made here to reflect in Canvas.
How to: Hide Courses on the Dashboard
In the Far Left Navigation, click on the “Courses” link, then click on “All Courses.” This will bring up a new page list of your Courses.
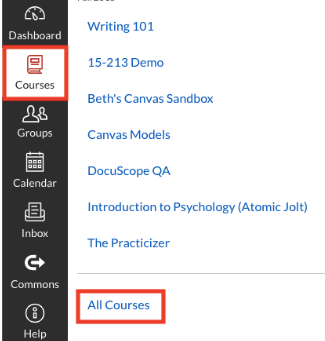
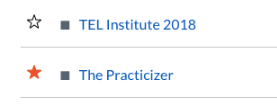
To favorite a course, click the star next to the title name. Courses with filled stars show the course is a favorite.
After you have manually favorited at least one course, Canvas will automatically favorite any new published course that you are enrolled in.
You can only favorite active courses. Past enrollments cannot be favorited, however, depending on course configuration, you may still be able to view your past enrollments after courses have concluded. Favorited courses from past semesters are not automatically removed as a favorite. If a past enrollment course still shows as a favorite, you can unfavorite the course by toggling the star icon.
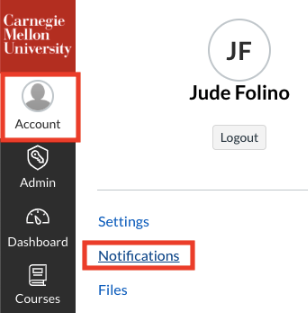
How-to: Change Notification Settings
To Change your Notifications preferences in Canvas, click on your Account in the Global Navigation Bar and then select “Notifications” from the list.
The Notifications page allows you to choose whether or not you wish to receive email notifications from your courses, and the frequency to which you wish to receive them. To change your preferences, simply click one of the four icons, listed below:
- Notify me right away (Checkmark Icon) - Notifications set to Notify Me Right Away may be delayed by up to one hour.
- Daily summary (Clock Icon) - Delivery varies among users, but daily summaries are typically sent out around 6pm in the user’s time zone.
- Weekly summary (Calendar Icon) - The date and time of your weekly notifications are posted at the bottom of your notifications page.
- Don’t send (“X” Icon)
These changes are made immediately once an option is selected. Your Notification settings apply to all of your courses and you cannot change settings for individual courses.
Find more information on Notifications in this Canvas resource [pdf]
How-to: Use LockDown Broswer
LockDown Browser is a custom browser that locks down the testing environment within Canvas. While taking an exam, you cannot print, use other applications, visit other websites, or search the internet.
If you were to open a Canvas quiz within a normal browser, the page would look like this:

To Download the tool, navigate to the respondus website. Once installed on your computer, launch the browser and sign into Canvas as you would normally. When you begin the quiz, you will no longer be able to navigate away from the browser until you complete the quiz.
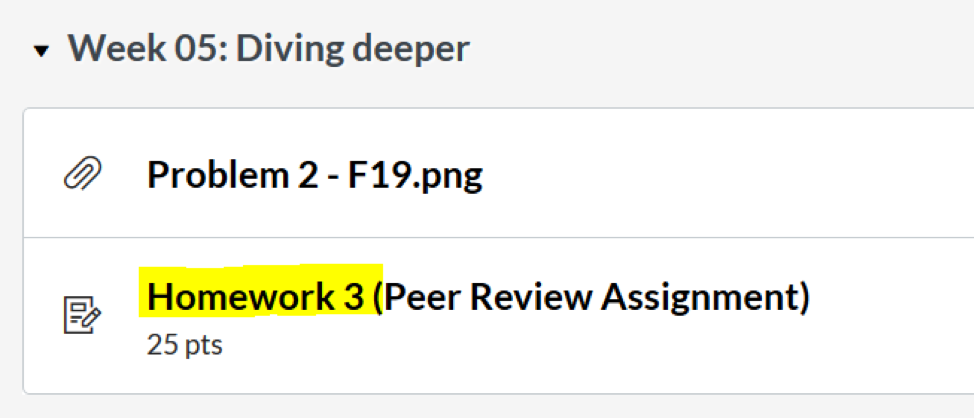
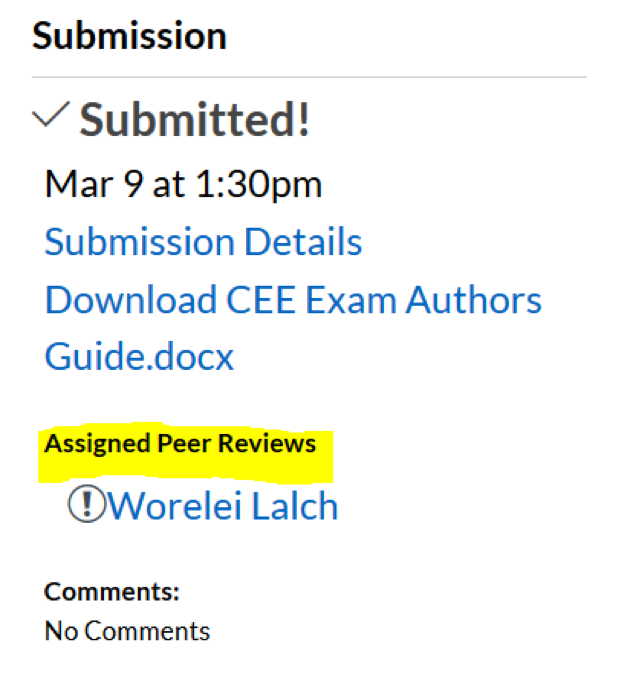
How-to: Complete a Peer Review Assignment
To access and complete your assigned peer reviews, click on the assignment that you are completing a peer review for:
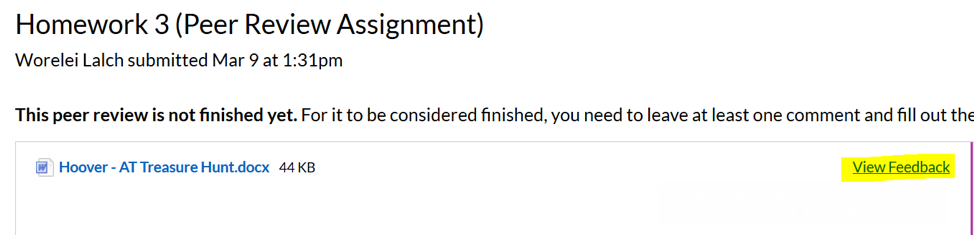
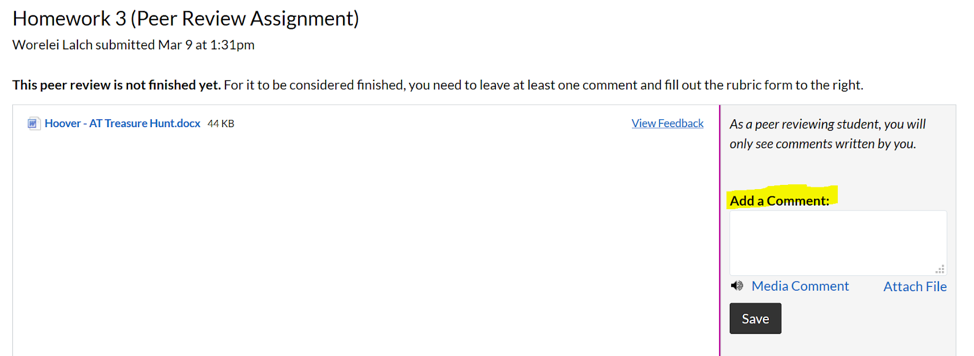
You can also leave general comments in the comment box on the right side of the peer review screen:
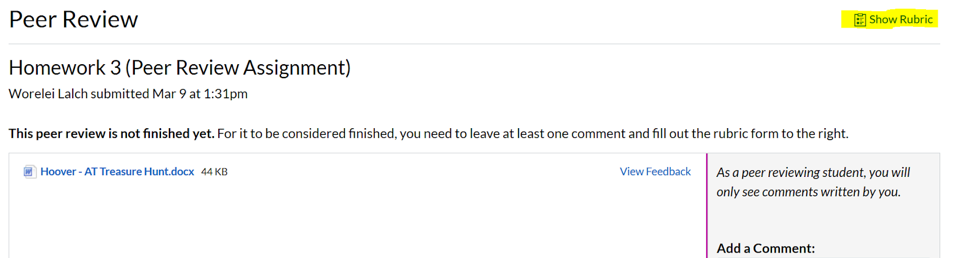
You instructor may have attached a rubric for you to use when reviewing your peers. If this is the case, you will need to fill out this rubric for your peer review to be considered complete.
You can access the rubric by clicking the “Show Rubric” link in the top right area of the peer review screen:
Click on the applicable rubric scores for your peer’s work. You can leave comments on the rubric by clicking the comment bubbles inside the rubric:
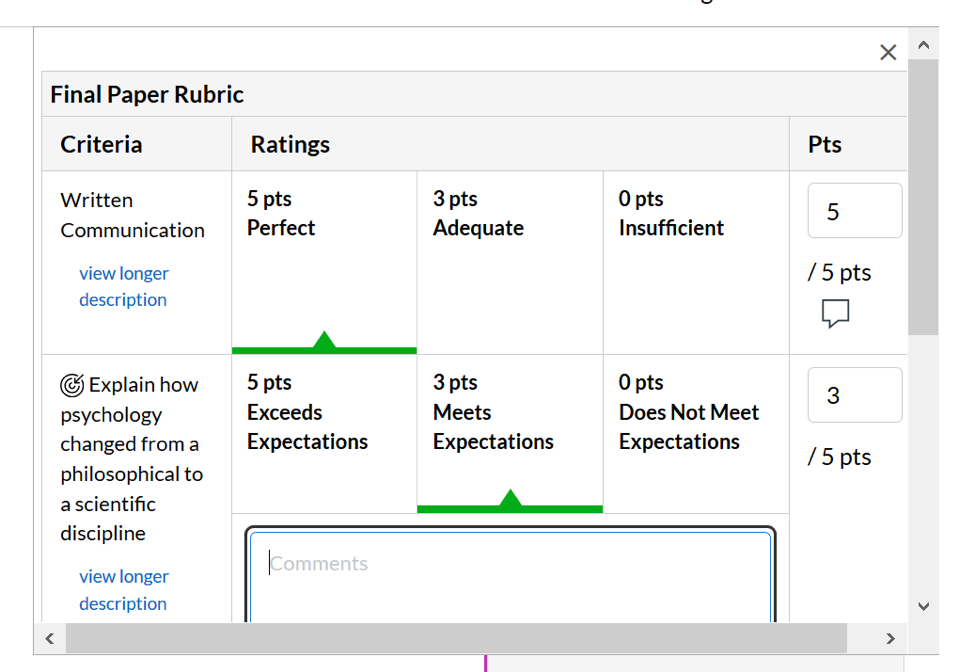
When you are finished reviewing your peer’s work, click the “Save” button to submit your peer review.
Contact Us for Canvas and Ed Tech Support:
![]() eberly-assist@andrew.cmu.edu
eberly-assist@andrew.cmu.edu
![]() 412-268-9090
412-268-9090