Instructor Guide: Add Users, Manage Views
Manually add users to Canvas
Student enrollments are picked up automatically. However, you may wish to provide access to other users (e.g., TAs, Waitlisted students). See how to manually add users to your course and ensure they are not removed when automatic enrollments update.
Provide access to external guests
Provide guests with access to Canvas by providng them with an Andrew ID. You can do this by requesing a Personal Sponsored Account from Computing Services.
See what students see
Student View allows instructors to view a Canvas course as if you are a student. With "Student View" turned on, you can see what content is visible to students and practice with your assignments and quizzes as if you are a student.
Hide courses from the Dashboard view
Students past courses are removed from the Canvas Dashboard shortly after the start of a new semester. However, for instructors, TAs, and course designers, previous Canvas courses remain on the Dashboard for a longer period of time. You can clean up your Dashboard view by hiding old course sites.
Rearrange courses on the Dashboard
If you would like to rearrange the course tiles on your Canvas dashboard, the following steps will help you do so.
How-to: Manually add users to Canvas
- Retrieve the user’s email address from the CMU Directory
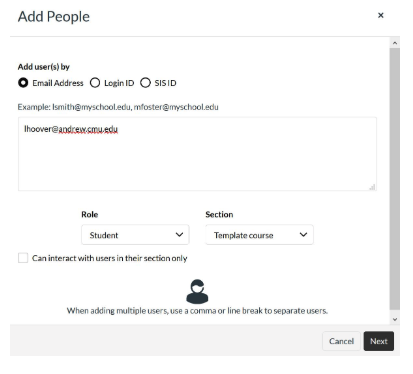
- In your Canvas course site, go to the People area and click the “+People” button
- Paste in the user’s email address and click the “Next” button. Note: you can use the Role drop-down menu to specify which role the user should have. More information on roles can be found here.
- Make sure the user listed is the person you would like to add to your course site and then click the “Add Users” button
Preventing Users from Being Removed from a Course
For all courses linked to the Registrar’s automated enrollment feeds, if a user who is not on the official roster is added to the section that automated enrollment feeds run to, the user will be dropped from the site the next time the automated enrollment feeds run.
If you would like to add users to the course who do not appear on the official roster, when you come to the Add People window (where you can paste in a user’s email address), use the Section drop-down menu to add students to the non-automated enrollment section.
The non-automated enrollment section is the section that has your course title. Automated enrollment feeds only run to the numerical course sections.
How-to: Provide access to external guests (sponsored account)
In order to access Canvas, users need to have an Andrew ID.
Fill out this Computing Services form to request a Personal Sponsored Account to receive an Andrew ID for an external guest: https://accounts.cmu.edu/accounts-cmu-client/accountsrequest/
It may take up to 24 hours for Computing Services to fulfill the request. Once the sponsored account has been created, you can add them/their Andrew ID to your Canvas course site.
Important Note: If you wish to add a student who is not affiliated with CMU but who will be registered through the CMU registrar, DO NOT use this account creation process. Rather, the student will receive their own Andrew ID and will be picked up by the automated enrollment process.
How-to: Turn on Student View
- Go to the Home area of your course site and click the “Student View” button.
- Navigate around the course and try things out as you'd expect students to do (e.g., take a quiz). Then when you are done, click to "Leave Student View” (in the bottom right area of your browser).
How-to: Hide courses from the Dashboard view
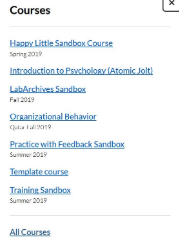
- Click on the Courses icon in the far left navigation pane
- Click the “All Courses” link
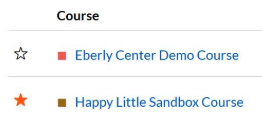
- In this list, star the courses you would like to remain on your dashboard. Any un-starred courses will be removed from the Dashboard (though, you will be able to continue accessing them through this "All Courses" area)
- When you go back to the Dashboard, only starred courses will appear.
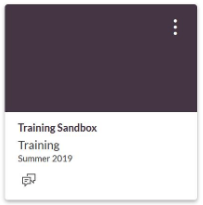
How-to: Rearrange courses on the Dashboard
- Login to Canvas
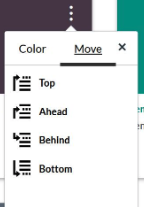
- Click the three dots in the upper right corner of the tile you would like to move
- Click the “Move” tab
- Select one of the four options
- Top - moves the course tile to display first in your list of course tiles
- Ahead - moves the course tile one place ahead
- Behind - moves the course tile one place behind
- Bottom - moves the course tile to display last in your list of course tiles
Contact Us for Canvas and Ed Tech Support:
![]() eberly-assist@andrew.cmu.edu
eberly-assist@andrew.cmu.edu
![]() 412-268-9090
412-268-9090