How Do I Upload and Manage Files?
Canvas provides a file manager for organizing all of your course documents (e.g., pdf, docx, pptx) into folders (e.g., readings, problem sets, homework). These documents can then be linked from anywhere within the course (e.g., from the Modules page, an assignment, a quiz, a content page).
You can either upload files directly to the "Files" area or you can upload from anywhere else within the course and they will also be added to the files area as a result.
- NOTE: We recommend that you keep the "Files" left navigation item unavailable to students so that you do not accidentally provide students with access to documents that you'd prefer they not see (e.g., solution sets).
There are several other ways you can provide students with access to files in an organized and controlled fashion. Using "Modules" is one good way to do this. Here's how:
Using Modules as a way to upload, manage, and provide students with access to course documents/files.
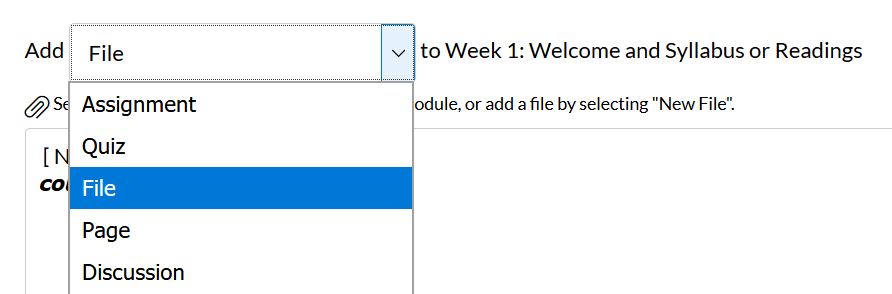
- Navigate to the "Modules" area of the course. Add a Module and label it (e.g., Week 1: Welcome and Syllabus or Readings). Now that you have a module, you can add items to it, includng files.
- Click the "+" button next to the module title to add an item to that module.

- Using the dropdown menu that appears, select "File" from the list and then click "New File".

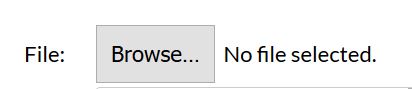
- Click "Browse" to find and select a file from your computer
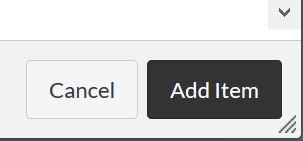
- Once the file has been selected, click "Add Item" to upload the file to the Module.
Contact Us for Canvas and Ed Tech Support:
![]() eberly-assist@andrew.cmu.edu
eberly-assist@andrew.cmu.edu
![]() 412-268-9090
412-268-9090