Register for Courses in 4 Easy Steps
This page contains step-by-step instructions for course registration at Carnegie Mellon University, including a pre-registration checklist, how to plan and check your course schedule, share with your advisor, confirm your registration start time, and register for courses.
Preparing for Registration Checklist
- Use the Stellic Degree Audit Application to monitor your progress and plan your degree. You can search for relevant courses in a number of ways and share your plan with your advisor directly through the application.
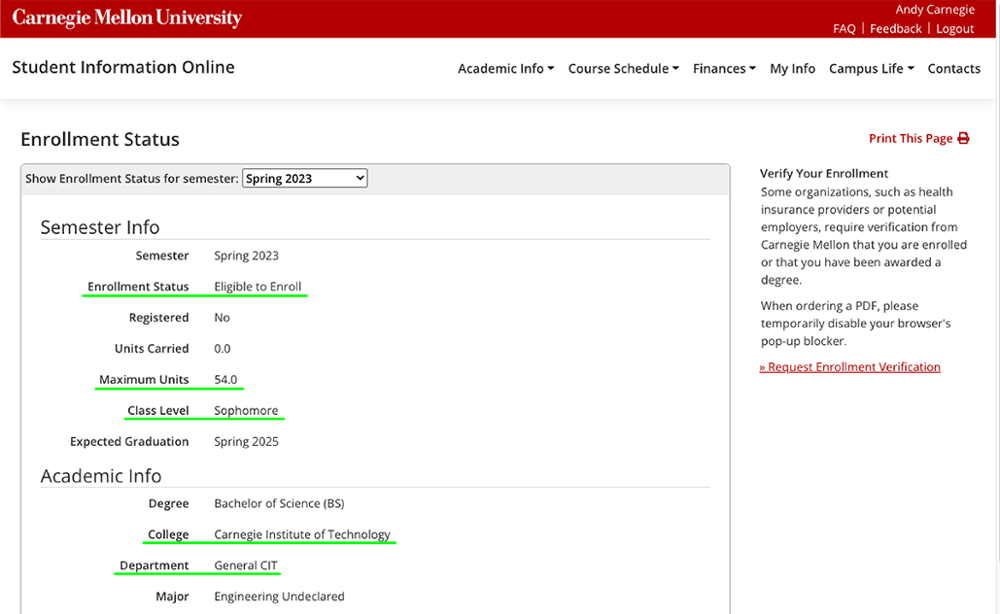
- Navigate to the SIO Academic Info tab and select Enrollment Status and the upcoming semester to confirm the following:
- Enrollment Status is 'Eligible to Enroll' (if not, email thehub@andrew.cmu.edu)
- Maximum units for which you can plan to register for (overloads are reviewed and permitted only after registration week)
- Class Level, College and Department are correct (if incorrect, please contact your home academic department)
Step 1: Plan Your Course Schedule
Planning Your Schedule
In addition to planning a course schedule in SIO, you may also use the Stellic Degree Audit application, a collaborative tool that assists with schedule planning, retaining past course plans, and meeting degree requirements. Incoming students joining us in the fall semester will gain access to Stellic in early July. Incoming students joining us in the spring semester will gain access in early January. All students should still create a course plan and register in SIO. It is not possible to register for classes using Stellic. To plan your schedule:
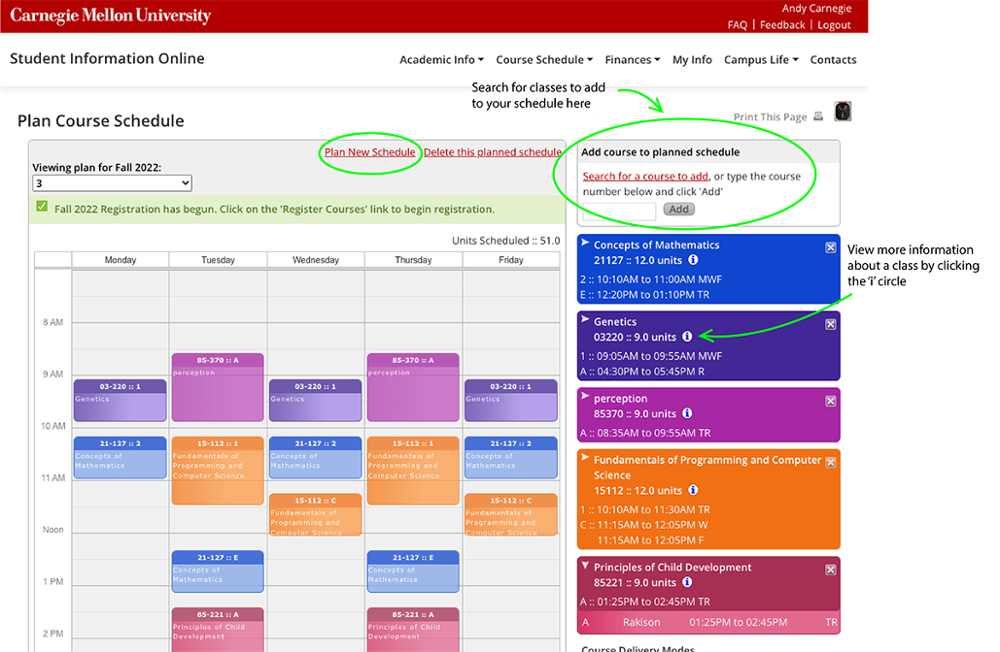
- Navigate to the SIO Course Schedule tab and choose 'Plan Course Schedule'
- Click 'Plan New Schedule,' select the upcoming semester, and name your course plan
- Browse for courses to add, or type the course number into the box and click 'Add'
- As you prepare for the semester, remember that there are 10 minutes between the start and end times of classes. You should carefully consider the location of your classes as you plan your schedule to ensure you have adequate time to travel between classes.
- To change a course section in your plan, click the multi-colored course boxes on the right side of the page and select a different course section
- View more information about a class by clicking on the blue 'i' circle information button
Checking Your Schedule
Once you have planned your schedule, please double-check to ensure that you:
- Do not have a registration hold (if you do, please contact your academic advisor)
- Meet the necessary pre-requisites and intend to register for any necessary co-requisites
- Understand any course messages (select the blue 'i' information link for each course)
- Understand that classes with locations listed as TBA should contact the department offering the course for more information. Classes marked as TBD have not been assigned a room location yet, and you should check back to confirm the location prior to registration
- Meet any course-section reservations
- Have no schedule time conflicts and that course-section times have not changed prior to registration. Registering for courses with time conflicts is only possible in certain circumstances.
Step 2: Review Schedule with Your Advisor
Navigate to the SIO Contacts page to find your advisor's email address and phone number. You can send your advisor the name of your planned schedule and review it together.

Step 3: Check Your Start Time
Navigate to the SIO Registration page under the Course Schedule tab to view your registration start time. Remember, your start time is when you can begin registering for courses, you can continue registering until the start of the next semester's classes. If you have a registration hold, your registration start time will not appear until your registration hold has been lifted. You will need to reach out to either your advisor (for academic or planning purposes) or The HUB (for any financial hold).
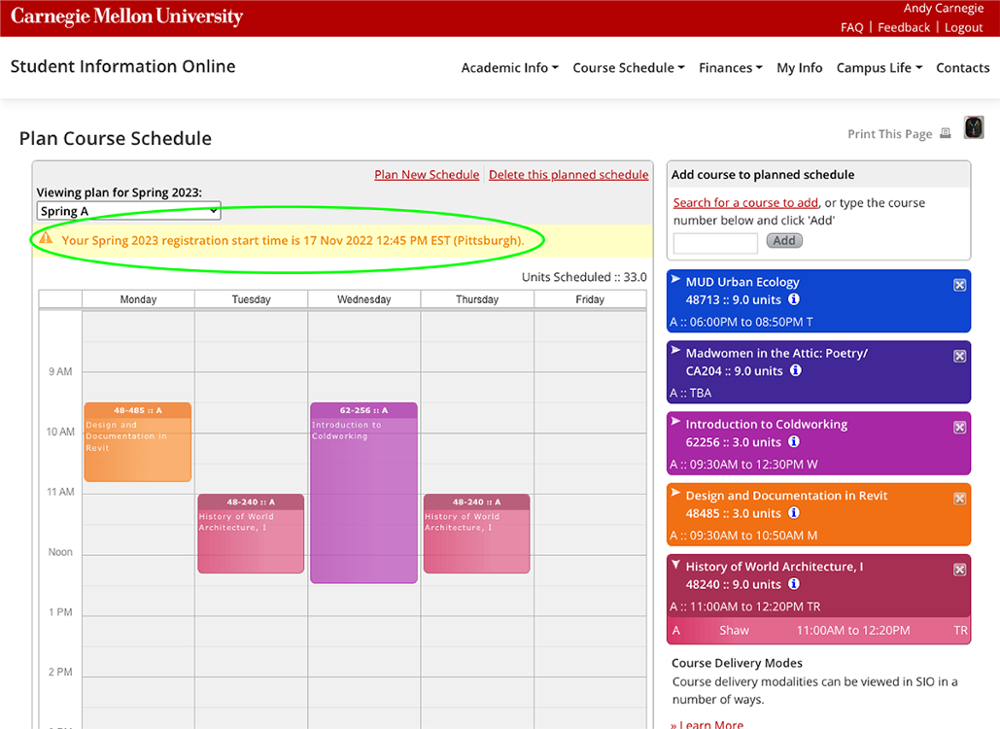
If you are unable to register because of an academic hold placed by your department or a financial hold placed by Student Accounts, a warning will appear in the highlighted bar that normally displays a start time. For questions regarding an academic hold, please contact your academic advisor. For questions regarding a financial hold, you can contact your HUB Liaison.
Step 4: Register for Classes
- Click the Registration button on your SIO homepage or select Registration from the Course Schedule tab
- When your registration start time begins, use the gear wheels to register, drop, switch and manage your waitlist
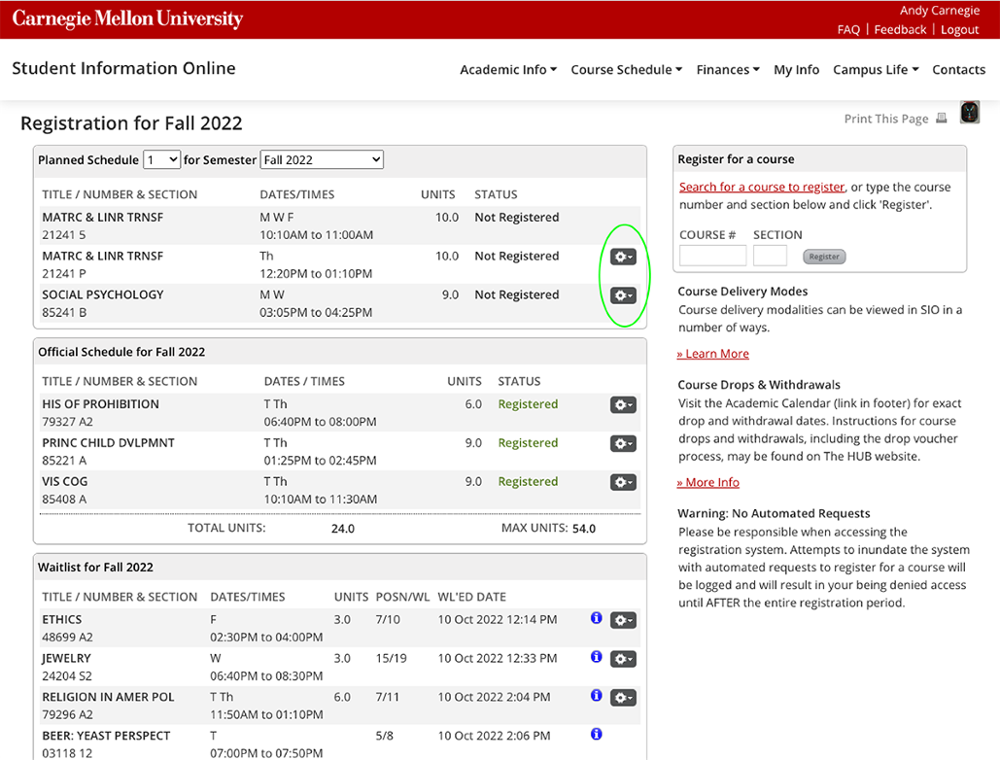
- After registering, if you were waitlisted or have a schedule conflict, please refer to the waitlist guidance page