Evaluate Student Work
Assignments
Instructors can add an assignment to receive student work within
Blackboard. Assignment creation triggers a new column creation
in the "Grade Center" spreadsheet and allows all assignment
submissions to be downloaded at once.
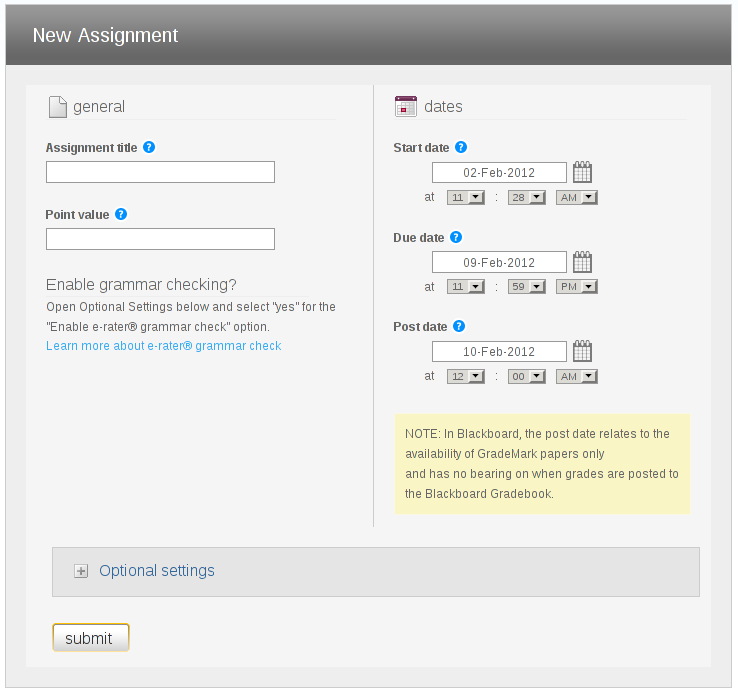
Add an Assignment
-
Navigate to a content area within the course.
-
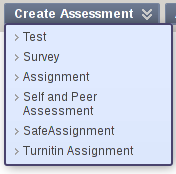
Select "Create Assessment" from the action menu items.
-
Select "Assignment" from the dropdown menu.
-
Enter necessary information regarding the assignment title, description,
and upload any files if necessary.
-
Enter the number of points possible that students can achieve.
-
Select when to make the assignment available to students.
-
Click "Submit" to complete the creation process.

Note: The assignment link should be visible in the course
content area where it was placed.
Note: Once a student submits an assignment, an exclamation point
icon will appear in the respective column and row for the assignment in
the Grade Center spreadsheet.

Warning: Students will not see the assignment if it is not made
available to them. There are several options for selecting when and for
how long an assignment is available to students; the due dates may also
be restricted.
Student Submission Process
To review how students submit assignments, read the
assignment submission
documentation for students.
Add a Turnitin Assignment
Turnitin is a plagiarism detection service that can evaluate student
submissions.
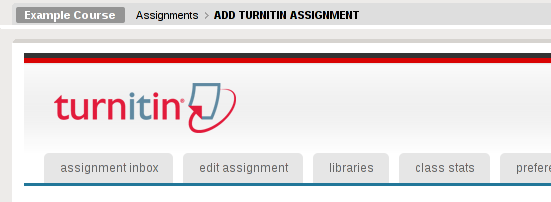
Instructors can create an assignment that uses Turnitin as follows:
-
Ensure that "Edit Mode" is set to "On" in the upper
right corner of the Blackboard course page.
-
Navigate to a content area within the course.
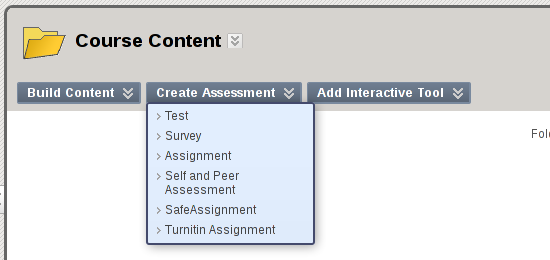
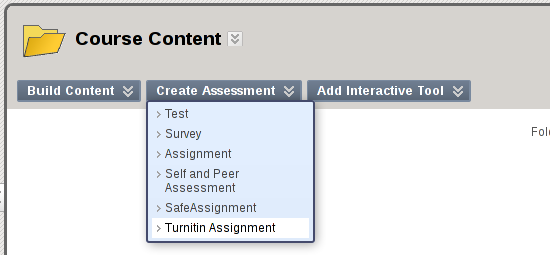
-
Select "Create Assessment" from the action menu items.
-
Select "Turnitin Assignment" from the dropdown menu.
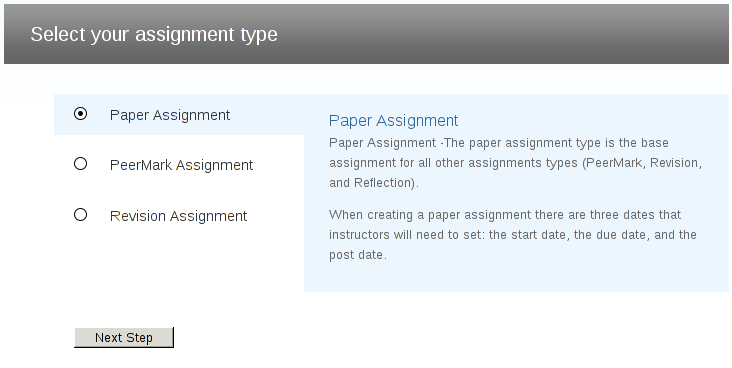
-
Choose the type of assignment and click "Next Step".
("Paper Assignment" is the basic assignment type.
In addition, the other assignment types first require a corresponding
"Paper Assignment").
-
From the "New Assignment" page, provide the title, point
value (if desired), and the corresponding dates. Be sure to click on
"more options" for additional assignment creation
settings.
-
After updating the "New Assignment" page click
"Submit".
-
An assignment creation confirmation message will appear. Click
"OK".

Student Submission Process for Turnitin
Assignments
To review how students submit Turnitin assignments, read the
Turnitin
assignment submission documentation for students.
Grade an Assignment
After a student submission, instructors will have access to the students'
work for reviewing, providing feedback, and grading. Instructors can access
submitted student assignments through the Grade Center spreadsheet:
-
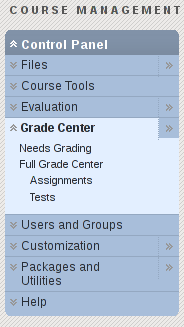
Navigate to the "Control Panel" and click to expand the
"Grade Center" menu items.
-
Select "Needs Grading". This presents only those submissions
that have not yet been graded. Note: Other views are
available in the "Grade Center", e.g.: To see only assignment
submissions, select "Assignments" under "Full Grade
Center".
-
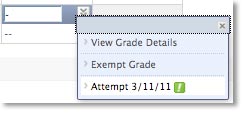
Click on an exclamation point icon and select the "Attempt"
listed or select "View Grade Details" from the drop-down
menu.
-
Review the submission, enter a grade, and provide feedback in the
provided form.
Download Assignment for Grading Offline
Instructors can download all student assignment submissions or can select
individual student submissions to download:
-
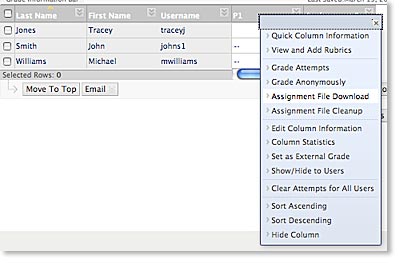
From the Grade Center spreadsheet, click the down arrows in the heading
of the assignment column you wish to download. Select "Assignment
File Download" from the dropdown menu.
-
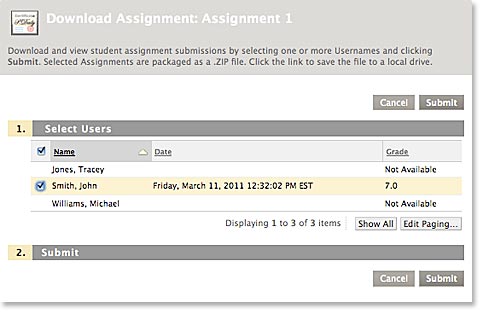
Use the top checkbox next to the "Name" column to select all
student submissions (clicking the top checkbox selects all checkboxes
below it) or select the checkbox next to individual student submissions
for a more selective download.
-
Click "Submit".
-
The system creates a compressed file in .zip format containing the
assignment files. Click "Download assignments now..." and
save the file to the local machine. Once the download is complete,
use a standard system utility to decompress the file; this procedure
is OS specific, but typically entails double clicking the downloaded
file on the desktop or a file manager.

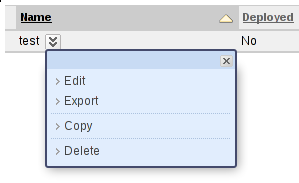
Manage Tests & Surveys
From the "Tests" page in Blackboard, instructors will find the
functionality for building and importing new tests, as well as a way to
add questions to, edit, deploy and make available to students, and delete
tests already created.
Note: Surveys are created much the same way tests are created.
Use the "Surveys" page instead of the "Test" page and
click to "Build Survey" or "Import Survey" and follow
a similar process as creating a test. The main difference between Tests
and Surveys is that Surveys are anonymous. A green checkmark will appear
in the Grade Center spreadsheet to indicate when a student has submitted
a survey, however no student data is associated with student responses.
Create a New Test
-
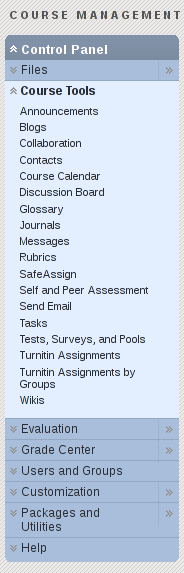
From the "Control Panel", expand "Course Tools"
and click on "Tests, Surveys, and Pools".
-
Click "Tests" to go to the "Tests" page.
-
Click "Build Test" to go to the "Build Test"
page.

-
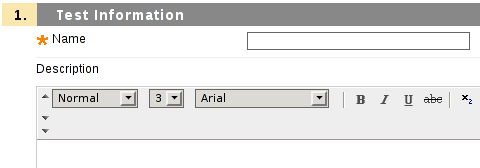
Populate the test metadata, including the name, description, and
instructions.
-
Click "Submit" to create the test and enter the "Test
Canvas" page where questions are added.
Add Questions to a Test
From the "Test Canvas" page, questions can be added to a test
by creating new questions in Blackboard, selecting from previously created
test questions or questions pools, or uploading questions from the local
machine.
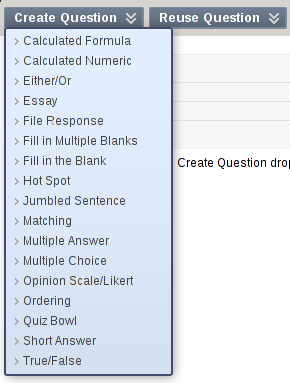
Select from a List of Question Types
To select from a list of question types, expand the "Create
Question" dropdown menu and select from the various question
types.
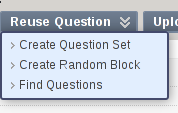
Create a Random Block of Questions/Find a Question from a Pool or
Test
To create a random block of questions or to find a question from a pool or
test previously created, expand the "Reuse Question" dropdown
menu and select the desired option.
Upload Questions Prepared Offline
To upload questions prepared offline, click the "Upload
Questions" menu item and select the prepared file from the local
machine.
Note: Questions will appear as part of the upload process. If
a question in the file has an error, only that question will fail to
upload. Questions from a file can be modified after the upload like
ones created directly within Blackboard.
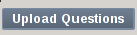
Create Test Questions Offline
Tests can be created offline in a spreadsheet application, exported
as a comma-separated or tab-delimited file, and imported to Blackboard.
Note: Microsoft Excel is the spreadsheet application used in
the instructions below, but any properly formated text file can be
imported.
-
In a new spreadsheet, enter the question information into rows and
columns. Each row will represent a question.
-
Column 1 — Enter an abbreviation representing the
question format. See the
table
of question types & abbreviations.
-
Column 2 — Enter the question text.
Note: Exclude all formatting: It will be not be honored
in the exported file.
-
Column 3 —
For MC,MA,ORD: Enter the text of a potential answer.
For TF: Enter the answer, either "true" or
"false".
For ESS: Optional Enter an example essay.
For MAT: Enter a value in the first matching pair.
For FIB: Enter the text before the first blank.
-
Column 4 —
For MC,MA: Enter the validity of the answer, either
"incorrect" or "correct".
For ORD: Enter the next answer in descending order.
For MAT: Enter the other value in the first matched pair.
For FIB: Enter the solution to the first blank.
-
Additional Columns —
For MC,MA: Repeat Column 3 & 4 as necessary.
For ORD: Enter additional answers in descending order.
For MAT: Repeat Column 3 & 4 as necessary.
For FIB: Alternate text and blank solutions as necessary.
Question Types & Abbreviations
| Abbreviation |
Question Type |
| MC | Multiple Choice |
| MA | Multiple Answer |
| TF | True/False |
| ESS | Essay |
| ORD | Ordering |
| MAT | Matching |
| FIB | Fill in the Blank |
| FIL | File response |
| NUM | Numeric Response |
| SR | Short response |
| OP | Opinion |
| FIB_PLUS | Multiple Fill in the Blank |
| JUMBLED_SENTENCE | Jumbled Sentence |
| QUIZ_BOWL | Quiz Bowl |
-
In Excel, select the "File" menu and then choose "Save
As". Enter a name for the file and use the "Format"
dropdown menu to select "Tab Delimited Text (.txt)".

A sample excel file [xls]
containing model questions and the table of question types is available
for download.
Manage Existing Tests
-
From the "Control Panel", expand the "Course Tools"
and click on "Tests, Surveys, and Pools".
-
Click "Tests" to go to the "Tests" page.
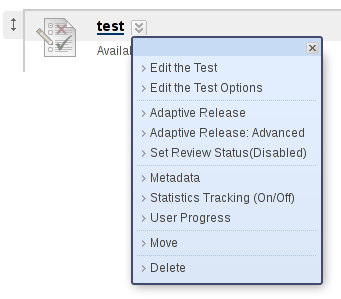
-
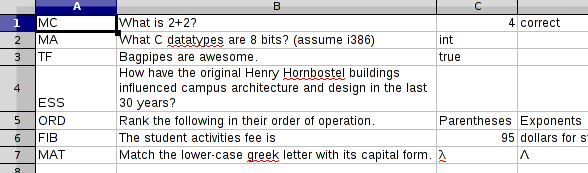
Click the down-arrow icon next to the test's name to expand the
contextual menu and options for edit, export, copy, and delete.
Note: The "delete" function will not be available for
a test once students have begun taking the test, or for tests which
have questions associated with the question sets of other tests.
Import a Test
Only tests that exported from Blackboard can be imported.
-
From the "Control Panel", expand the "Course Tools"
and click on "Tests, Surveys, and Pools".
-
Click "Tests" to go to the "Tests" page.
-
Click "Import Test" and select the prepared file from the
local machine.
-
Once the file is uploaded, click "Submit".
-
The imported test will be visible in the list of tests.
Administer A Test
An existing test must be deployed as course content and made available
to students before it can be taken by users.
Deploy a Test
-
Navigate to a content area within your course, then click
"Test" from the "Create Assessment" menu.
-
Click "Create" to make a new test and then follow the
directions to make a new test
or select from the menu of previously created tests.
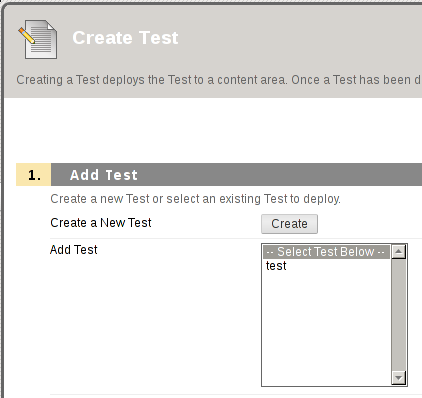
-
Click "Submit" to enter the "Test Options".
-
"Test Options" controls the test availability and test-taking
options for users.
Note: If a test isn't explicitly made available, it will not
be visible to student users.
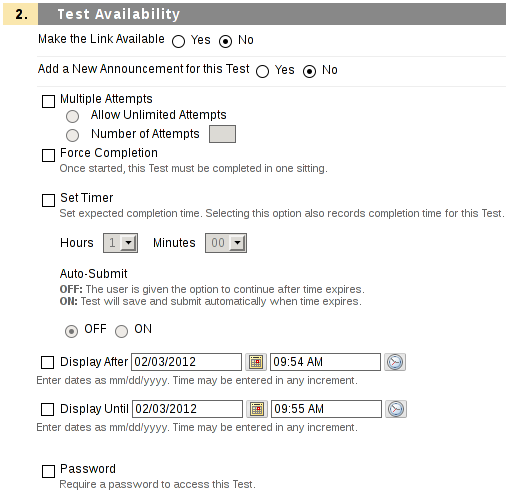
Make a Test Available
A test can be deployed without being immediately available to users.
To make it available after deployment:
-
In the content area where the test is deployed, click the context menu
and select "Edit" to enter the "Edit Test Options"
page.
-
On the "Edit Test Options" page, scroll to section 2,
"Test Availability". Click "Yes" next to
"Make the Link Available".

-
Click "Submit" to immediately make the content area visible to
student users.
Note: If the instructor restricts the dates for when the test
may be taken, students will not be able to begin taking the test until
that designated date and time.
The Grade Center
Within the Grade Center, instructors and TAs can view, edit, modify,
and override grades of assessments. Grades can also be downloaded
to or uploaded from exported spreadsheet (e.g. Microsoft Excel) files.

Download and Upload Grades
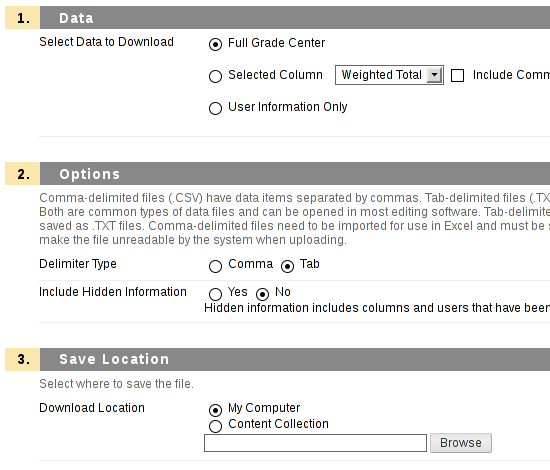
Download Grades
Instructors can download grading sheets from Blackboard. Partial or full
grading sheets can be downloaded.
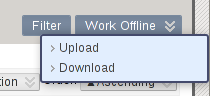
-
Within "Grade Center", select "Work Offline" in the
top right corner. Click "Download" to enter "Download
Grades".
-
Select the data to download and the download options.
-
Click "Submit" to download the file.
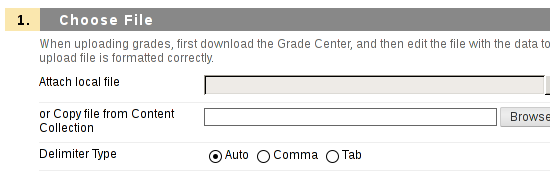
Upload Grades
-
Within "Grade Center", select "Work Offline" in the
top right corner. Click "Upload" to enter "Upload
Grades".
-
Select the file to upload and identify the delimiter type.
-
Click "Submit" to upload the file.
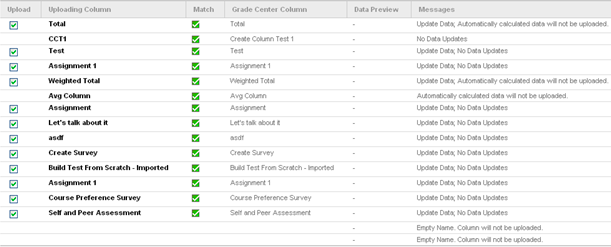
-
Blackboard will preprocess the file and check that its file format,
column names, etc. are synced. Detailed information will be shown on
the page. Confirm the format, select uploading columns and click
"Submit".
-
An upload message will be shown in the top status bar. Go through the
grading sheet to check that grades and other data uploaded correctly.
Change the Grade Center View
The Filter Bar
-
Within "Grade Center", select "Filter" in the
top right corner to expand the "Filter" sub-menu.

-
Choose the display criteria:
-
Current View — The view to display.
Click on the downward arrow and select the preferred options
from the list. Instructors can also select the prior defined smart
views to display. Refer to the "Smart View" section for
detailed information about smart views in the Grade Center.
Click on the disk icon next to the "Current View" dropdown
menu to set the current view as the default view.
-
Category — The type of assignment.
Instructors can specify the type of columns to show in the current
view to narrow down the scope of the current view.
-
Status — To display assignments of this status.
Instructors can specify that assignments of this status are the only
ones to display. The updated view will be displayed below in the
spreadsheet in the Grade Center.
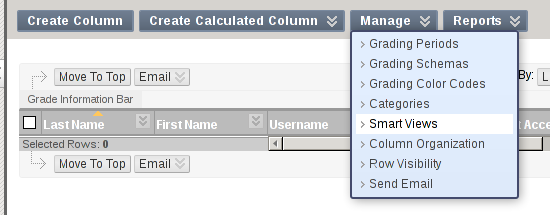
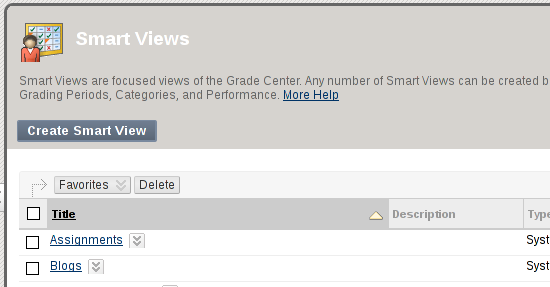
Smart Views
Smart Views are focused views of the Grade Center. Any number of Smart
Views can be created and saved based on a variety of criteria including
Grading Periods, Categories, and Performance. The instructor or TA can set
up different Smart Views to select different groups of users to put in one
Smart View.
-
Within "Grade Center", select "Manage" from the
top menu bar. Click "Smart Views" to enter "Smart
Views".
-
A list of existing smart views will display. Existing smart views can
be edited by clicking "Edit" under the context menu of the
desired view.
-
Click "Create Smart View". Fill in required information and
choose the selection criteria for the view.
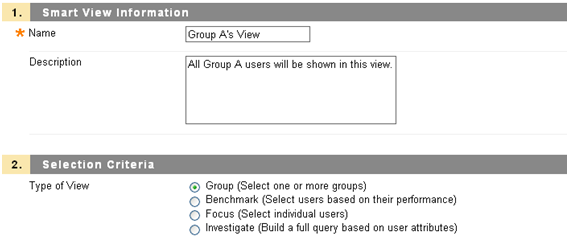
-
Click "Submit" to confirm the design of the smart view. A new
smart view will be created. Order the grade histories. Click on the
header of the table to reorder the entries by different attributes.
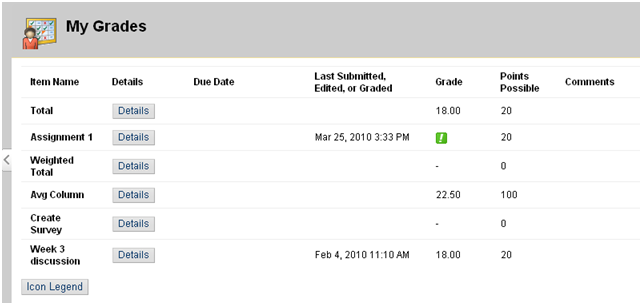
Manage the Student Grade View (My
Grades)
The student view of the "My Grades" course tool will reflect the
order of the columns shown on the "Full Grade Center" view. The
instructor can organize the order of the columns in the "Full Grade
Center" view to manage the student view for grades.

Alter the column ordering:
-
Within "Grade Center", select "Manage" from the
top menu bar. Click "Column Organization".
-
Adjust the order and show/hide property of the columns via drag &
drop operations.
-
Click on "Submit" to apply the change. The changes are
reflected in the Grade Center as well as Students View of the "My
Grades" page.
-
(Optional) Make columns disabled from Student View only.